Feeds:
Posts
Comments

Archive for March, 2011

While looking through pictures for last years showhouse room, I pulled out some favorite projects. There are some before and after shots (wishing I had a great camera), also a couple of murals that were my favorites. Mother Theresa is sitting beside me and commenting on her favorites as well. My mother has always supported me in whatever I’ve choosen to do, she is my biggest fan. Mother Theresa gave me passion, strength and the ability to cook a great meal. We have chatted many times about these projects, and she has always given her opinion to me when I am looking for one (and sometimes when I’m not), Here are some of our favorites:

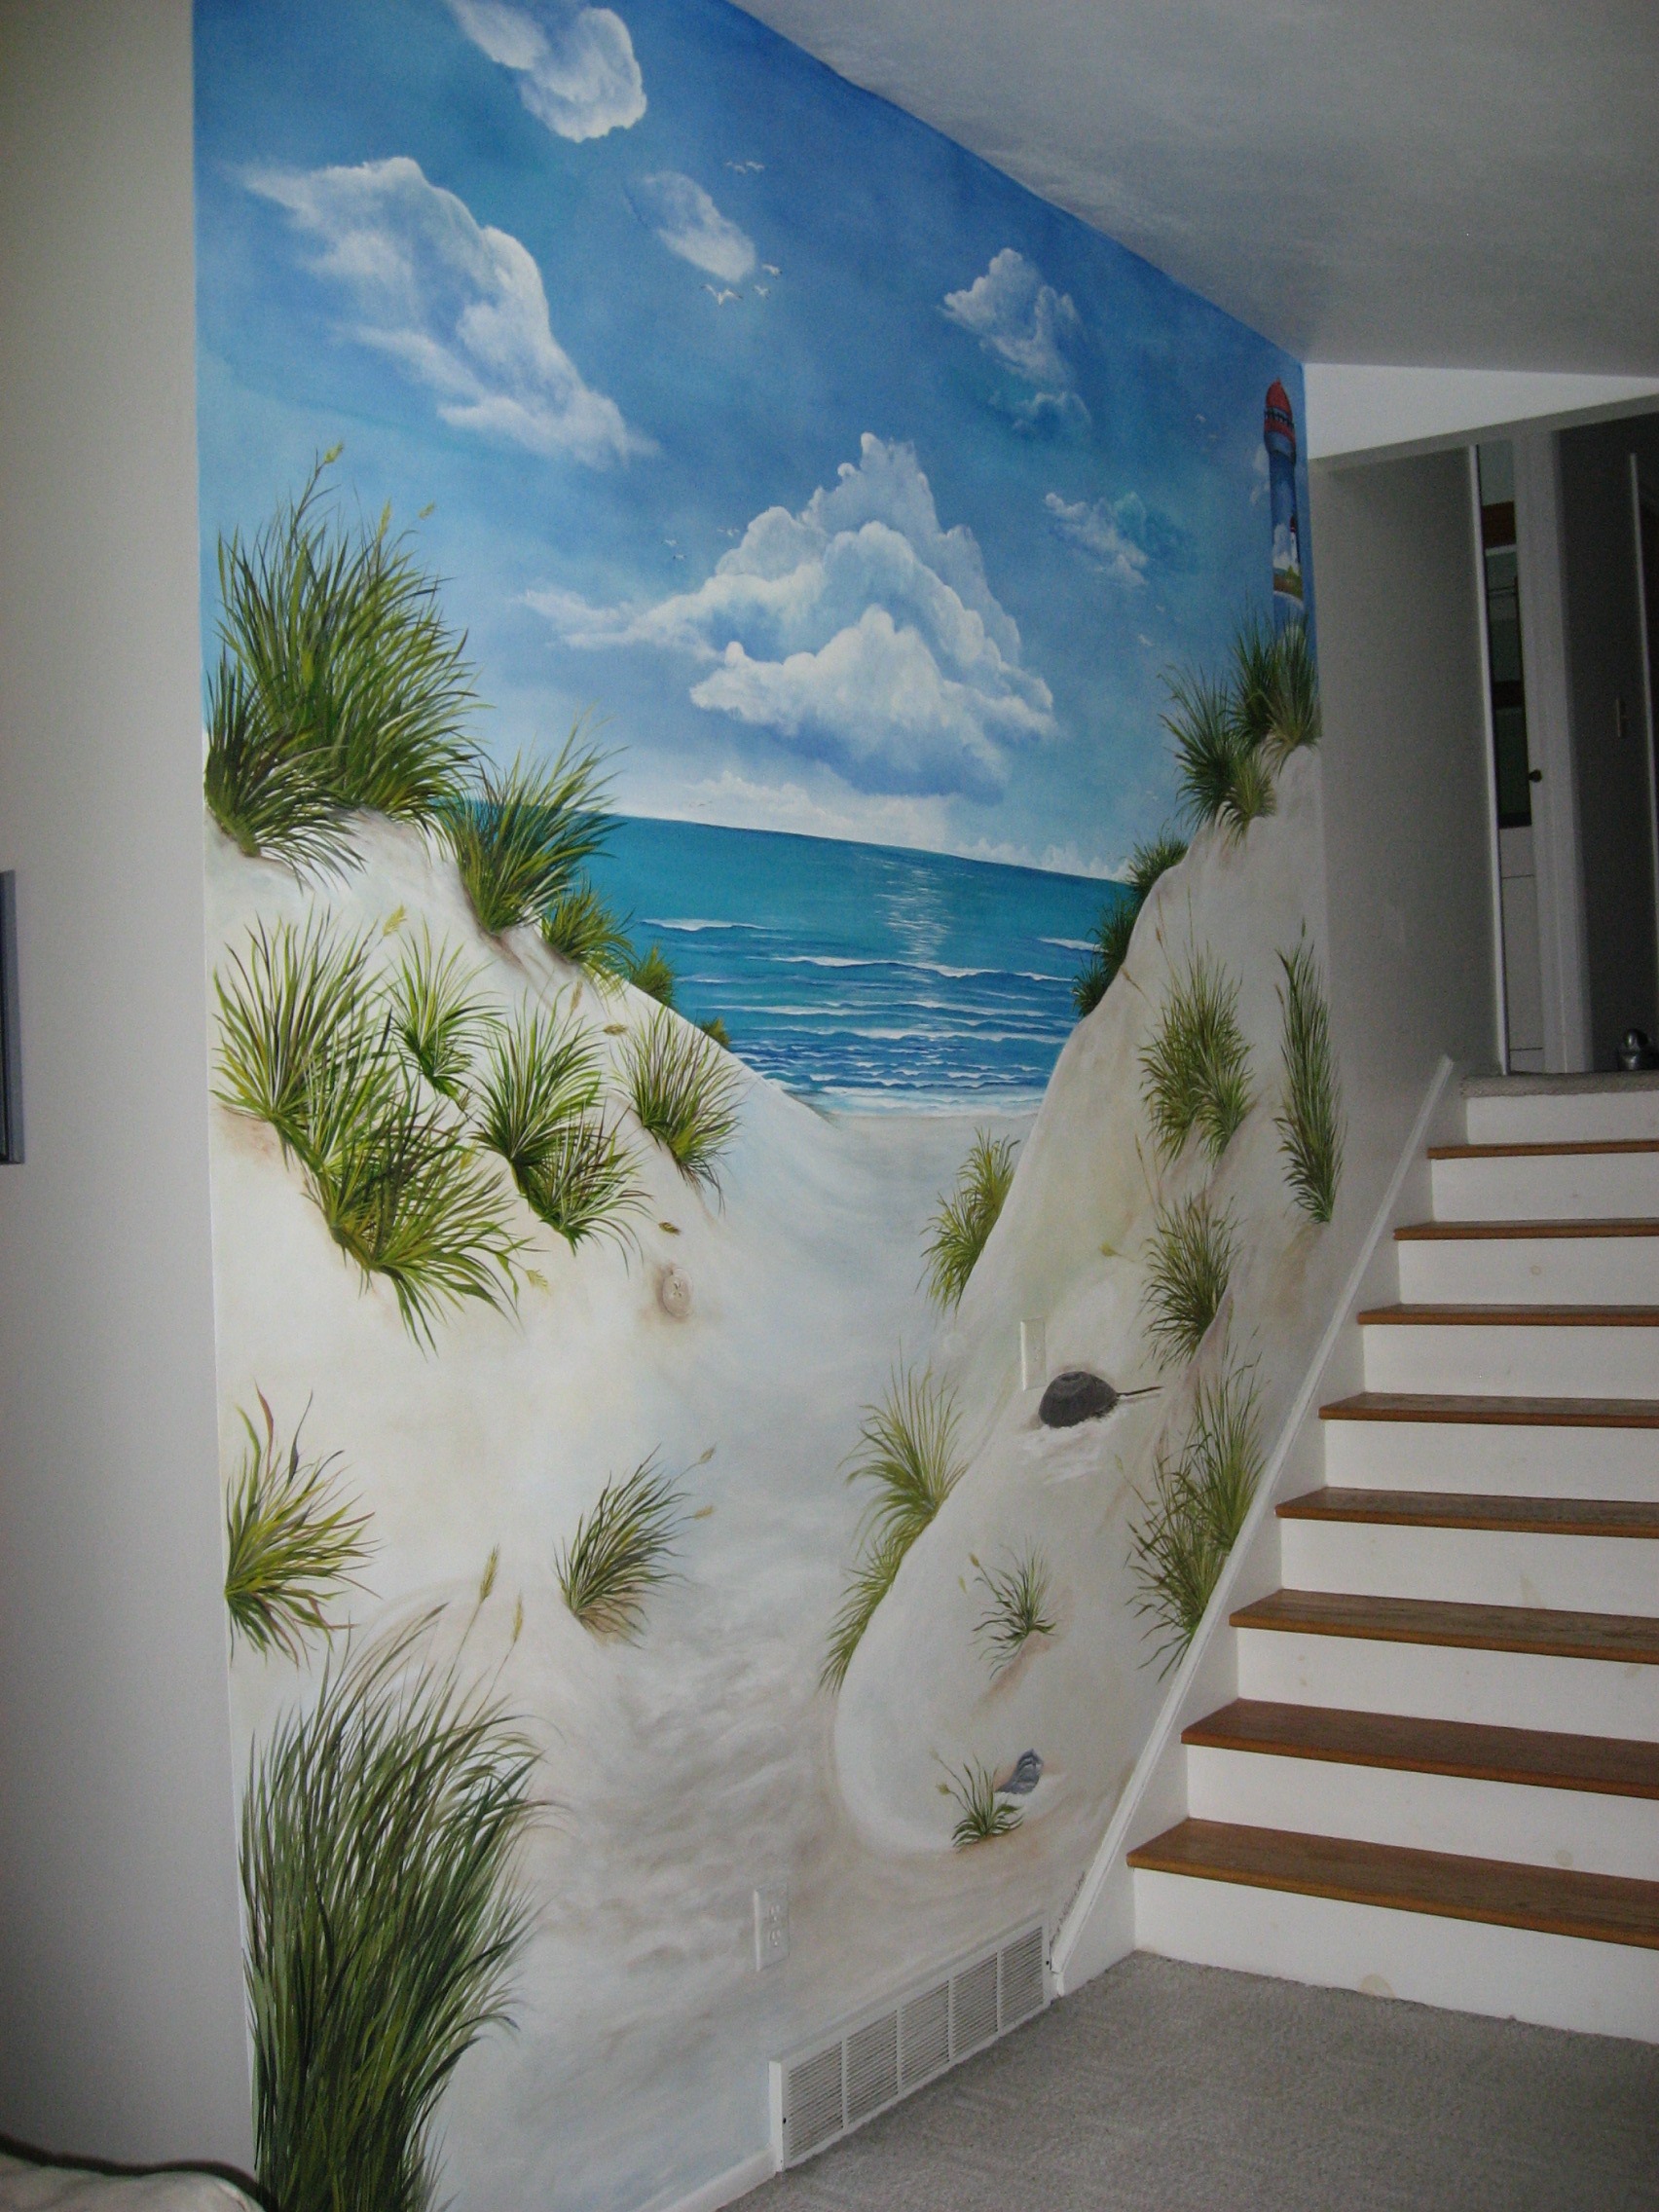
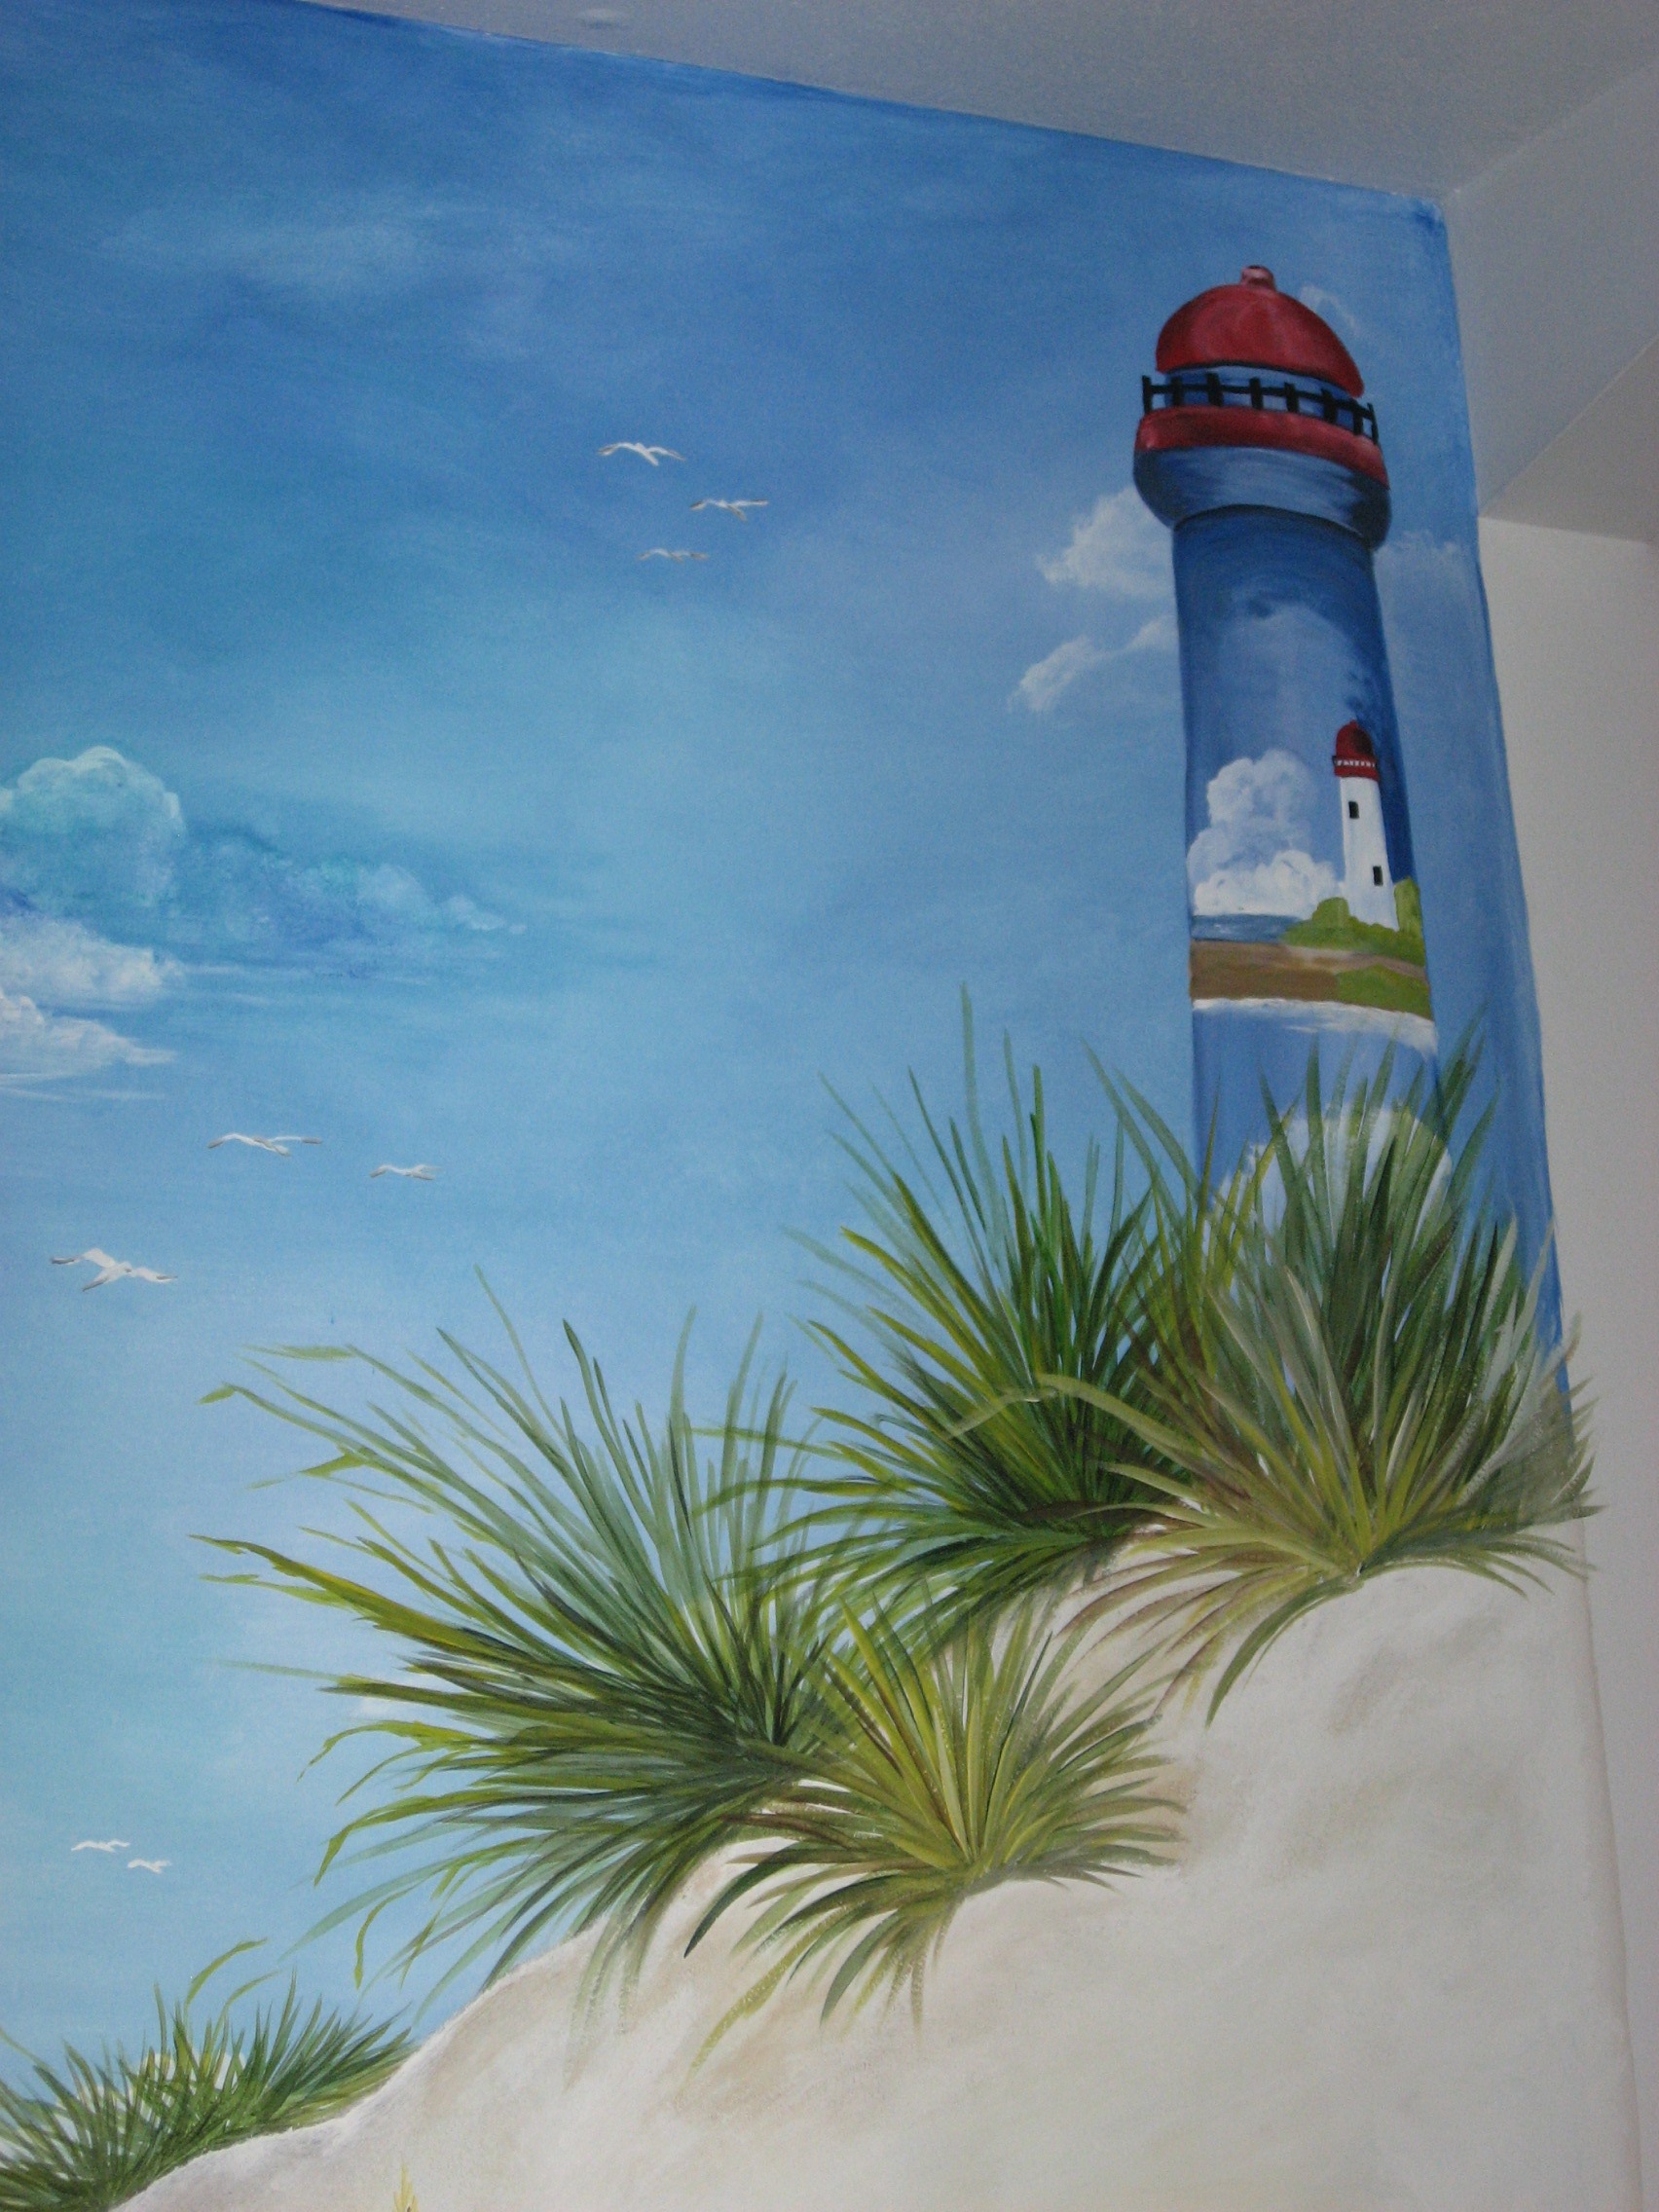
The mural that we picked, was this serene and peaceful, Ocean view! The coastal trend has really taken off. We see this in furniture, textiles and carpeting. You don’t have to live on the beach to design a room with coastal flair. This theme is inspired by sandy feet on a worn path… filtered sunlight dancing on the water… and would give any room a simple, elegant, and inviting Seacoast Cottage look.

 Moving on…. This country re-do gone Tuscan was of course one of Mother Theresa’s picks:

Before

During

Custom Hood

 
Removing the small cabinet and hood, made way for this fabulous hand panted custom hood and mantle! 


This project was so much fun, this client really made a dramatic difference in her space, we added a dramatic custom hood and tiled the back splash in tumbled travertine, with accent tiles, here are some additional pictures:

during

after

The living room ceiling had multiple fans, a header that was left when a wall was removed and pendant lighting over the sink. We removed the fans and the header, installed recessed lighting and unified the space, adding warm color to the walls was key to the tuscan atmosphere we created!

before

after


Birch Tree Mural

Red Cardinal

Full view

This mural was done for the same client in their Lake George summer home!!

I worked on this mural with a friend Nancy Narcavage, we had a great time creating this for a anniversary gift for the clients husband!!

I will post more make overs soon, but for now I would like to move on to current projects. This year I am doing another space in Vanguard Showhouse I have posted some information about this project and would like to continue sharing some of the current updates on this space.

This year I am working with a talented artisan, she is Mary Beth Johnson,  decorative painting is only one of Mary Beth’s many talants and interests. I met Mary Beth through showhouse and also the local IDAL chapter NEDA (Northeast Decorative Artisans). She’s an RN with a passion for  health and wellness, her website is BetterBoomerBodies.biz, Mary Beth is also involved with Isagenix and Asea.  As professional Health Coach and Cancer Coach, her up beat, bubbly personality makes her a great ambassador for health. Well I could go on but, I would like to share some of Mary Beth’s decorative work with you also.

Designed by Michel Patterson Hudson River Fine Interiors, Decorative Painting by Mary Beth Johnson

Wall Finish by Mary Beth Johnson design by Michel Patterson Hudson River Fine Interiors

Radall Perry Photography

Beautiful Faux in Showhouse


The Decorative painting done by Mary Beth Johnson, rooms designed by Michel Patterson of Hudson River Fine Interiors. 
Mary Beth is doing Luster Stone in my room this year in a beautiful coral color. Lunch Bag,  from the Martha Stewart Living pallet, is the color I chose for the walls, On the ceiling, Ben Moore Gray Cashmere, Mary Beth is going to give the medallion a custom finish  that will give it an extraordinary life of its own.
 
 A decorative finish is the perfect accent to create another level of depth in an environment.  Whether you are looking to enhance a ceiling, visually re-shape a room with an accent wall, or an entire room to transport the senses, decorative finishes will create an inspirational setting. Hope you enjoyed the pictures. Stay tuned as always for more inspirational  and luxurious spaces…
 
XOXO
 
M

Read Full Post »

The House was built by Frank Rossi, in 2008 located in Niskayuna. It was Simply Beautiful a Modern Classic was the theme for last years  Vanguard Showhouse.  All proceeds benefit the Albany Symphony Orchestra. The home, built in 2008 by Frank Rossi, was furnished and decorated by a score or more of the Capital Region’s best artisans.  The home’s 4,200 square gave them plenty of space to work in and numerous built-in amenities to work with.  There were five bedrooms (our Nursery is one) including a master suite, five full and two half baths, a gourmet eat-in kitchen, a formal dining room and a cherry wood library. The finished basement contains a kitchen, one of the baths and one of the bedrooms, a family room and a study area.  The home sits on half an acre in one of the most desired settings near the center of Niskayuna.

Last year I had the pleasure of working with Pamela Quick,  of NY Fine Finishing.

Pam and I looked at the space and thought about doing a child’s room. This was the start of many adventures with this space, many late nights looking for furnishings, lots of fast food, dinners together and brainstorming on how to carry out the design that Pam had in her head. We were able to use beautiful Robert Allen Fabrics (thanks to Jolie Cross Cohen), also Sherwin Williams (who employed me part-time as a consultant ) was kind enough to Donate paint for the whole project. This project and a few others were Highlights of my adventures. Here are some links to articles that popped up about Showhouse 2010 in the Capital District, Times Union, Sneak a Peek, The Examiner

Well posting pictures is so much fun!! Just to reminisce through completed projects, the WOW!! at the end of an adventure when the picture in your head becomes a reality and the feeling of accomplishment. I have had so much fun reminiscing, so enjoy!! I know I have, !!

Furnishings, Hand Painted Ceiling medallion and faux finishes made this space spectacular!!

This gorgeous dresser, was lent to us from Saratoga Signature, The piece of art in this space is a self-portrait of Pam Quick with her newborn daughter. Medallion on the ceiling, by yours truly, Michele Conti!

.

The on suite bath was an added jewel in this space!  What a fabulous Nursery, our room was called Rapunzel’s Tower, the canopy around the beautiful silk bedding (fabrics by from Robert Allen)  formed the tower. The faux on the ceiling and walls by Pam Quick.


Last but not least the picture of Rapunzel’s tower was hand painted on the Doll clothing chest which was in our Fantasy Garden Located in the walk in closet just off the bath.


Stay tuned for more Adventures…….

XOXO

M

Read Full Post »

Well time just flies when you’re having fun!! I can’t believe it’s already Thursday!!  Life can be so busy lately, so  this Sunday we took some time to pamper ourselves and decided to take a shortcut for Sunday dinner. Another way Laurene shares stress free living with me. (Laurene’s Words of Wisdom) Meals can be healthy, full of flavor and love, and not take the whole day to prepare (not that it would bother me, I love to cook anyway).

We made this semi-homemade dinner. We marinated the shrimp and scallops in Dulcet, Lemon,  Mustard, Dill sauce. Then made Virgo rice according to package and added black-eyed peas by Melissa’s steamed and ready to eat products.

 Recipe as follows: for all those who want to replicate this simple yet lucious meal.

For the Skewers:

1pound Shrimp

1pound Scallops

1 bottle Dulcet Lemon Mustard Dill Sauce

Laurene threaded 8 skewers alternating shrimps and scallops, then added 1/2 a bottle of Dulcet sauce and let them marinade for 30 minutes.

For Rice:

 1 box virgo yellow rice

1 pkg Melissa’s Black eyed Peas

Prepared Virgo rice, according to boxed directions and mixed in Melissas peas at the end to warm with rice,

I prepared a great salad and Dinner was served, I would  choose Ecco Domani Pinot Grigio, to accompany this meal.

So here are the pictures!! Hope you enjoy this easy stress free meal.

My hat is off to Laurene for a great Sunday dinner even Mother Theresa would approve of !!! Stay tuned……..

XOXO

m

Read Full Post »

My parents use to dance in their dining room to this song from Connie Francis, Never Never on a Sunday:

Mother Theresa use to always sing this song.

 I have always done something to make Sunday special, my favorite thing to do (of course!) is cook and eat a great meal!! Today Shrimp and Scallop skewers on the barbi. But before we work, we rest!!! Laurene and I have decided to do facials this morning!! (after mass of course) but this little spa thing lasted into the afternoon, with all of the massaging that was required.

 Warning : The following pictures may not be suitable for children or adults for that matter. This is some scary stuff, proceed at your own risk!!!

OMG! Who is this????

We first watched the video on how to apply and correctly do the three facial massages required they are, (ready??) Effleurage, peterissage and tapotement movements. This four layer facial is called, REPECHAGE which is the  french word for rescue!  Well enough talk here are some pictures of our Sunday… It is said a picture is worth a thousand words well… here are some that may leave you speechless LOL, Laurene on the ottoman, that’s me pretending to be an anestitician, very professional – me on my knees!!! this was the Layer 1: Seaweed Serum, applied after cleansing with a micro dermabrasion cleanser and toning with a mild toner. The serum is applied until absorbed (5 minutes). Layer 2: Hydrating Cream, upward and outward motions, massaging as mentioned above.!!

Layer 3:  in this 4 part process was a Seaweed Treatment Mask. This was mixed in a bowl.  2 parts –  powder and gel. Mixed till smooth and applied with the supplied spatula.

This dried quickly, so we worked fast to apply it to each other and then relaxed for 5 minutes, the next and last step was the Mineral Mask!!

Layer 4: Mineral Mask   Frightening!!!!  this went on right over the seaweed mask!! when it dried we were feeling like Jason from Halloween!!!


Well once we completed this wonderful treatment we not only felt relaxed and rejuvenated but we laughed and enjoyed the morning!! It was truly great!! the finished product well here it is!! What do you think we feel quite a bit younger, don’t you think?? (be careful what you say to 2 very beautiful women).

This is Laurene’s mask, we were able to remove it intact!! So cool!!

So that was our Sunday spa day!!  No work today, other than eating a terrific meal, to end our relaxing day!!

Recipe and pic’s of the rest of the meal tomorrow! Stay Tuned….

XOXO

M

Read Full Post »

I’m so excited about my new online store , Etsy.com.

I’ve been learning so much and having so much fun!!!!I  ! The store is just opened 2 weeks so bear with me while I get going. Working out some of the bugs and finding my way around the site. So many great people who are selling so many creative items, from jewelry to clothing. I have talked to so many of the people who have recently opened stores, also found a Etsy convention  that I plan to attend to meet and network with other sellers. Many of the stores have similar Items and would like to list with me, so I will be not only offering what I have created but many other items that I can list from  other people, they also will in turn list my items on their sites! More exposure for me !!

I am excited to be able to list Window Treatments!, with the help of my friend Grace Thomas, truly  a talented woman, who has agreed to help me fabricate some of the most luscious  window treatments and window designs on the market today! These are custom-made slip covers and window treatments sewn to perfection, lined and mounted!!! I will have slip covered pieces up this week so keep the store in your favorites and check regularly to see what’s new!!

We are working to create a Home Decor store that sells vintage items for your home, accessories , also hand-made custom window treatments and slipcovers, hoping to offer an array of unbearably fabulous and unique finds. As always stay tuned……

XOXO

M

I

Read Full Post »

My Showhouse Room

I am so excited to start this space. I have one of the five fireplaces in this home, and one of the nicest. This black marble fireplace is such a great focal point in this Guest Bedroom!

Cozy, Rejuvenating, Serene…..

The secret to an inviting guest room is a comfy bed of course, but ambience also induces peaceful slumber. For this restful retreat the use of soft patterns and soothing colors in the bedding and draperies wrap this room in luxury, while molding frames the hand painted metallic walls to create a subtle depth. Crown molding adorns the ceiling which provides a focus for the soft gray-green color that surrounds the center medallion.

Hand painted artwork over the fireplace hung from picture rail and exquisitely placed furnishings finish this space with an utterly inviting atmosphere for any guest!

These pieces are from Schuyler Pond, a simply must see shop located in Schuylerville, just outside of Saratoga, where you will find all types of truly wonderful treasures for your home and garden. Amanda Crames is the lady that owns this opulent, magnificent. sumptuous store and is a most amazing and talented person . Her keen eye has filled this grand space with a truly magical atmosphere of unending charm and whimsy. Greatly appreciate her input and loan of these great pieces for this space!

Marybeth Johnson is my very dear friend and talented artisan that has graciously agreed to work her magic on these old plaster walls!! We plan to use Luster stone in a soft coral color for the walls. Marybeth has created soft wonderful pallets in past showhouses and received accolades for her work. She inspires me everyday with her creativity, she is my mentor, teacher but most of all my friend. She encourages me and supports me in so many ways, always makes our time together important and having her with me on this project means this room will be nothing short of sensational!!!! As always stay tuned…

XOXO

M

Read Full Post »

So here it is!!! Finally, the step by step process for reinventing a great find!!  This is only my technique, many people do not sand or finish their pieces I always have.

So…. First go shopping!!!! , find a great piece that you want ( look at area junk shops or used furniture places). Pieces vary in price but a little work and you can create a treasure!!! If you remember when my sister,  Mother Theresa and I went  on our Mother Daughter Day, we came across this darling coffee table.

Well… I started by sanding this with 220 grit sandpaper. Just quick to clean off any dirt or build up of old wax. Then with Primer, a little paint and the following supplies:


I really like to use Zinsser bulls eye 123 primer sealer latex. It doesn’t smell as strong as the oil based product and clean up is easy, with warm water and soap. Some people prefer oil based which covers tough stains and knots,  Zinsser cover stain, stain blocker, bond coat is a great oil based primer for indoor & outdoor , it also eliminates the need for sanding . Great for so many projects, but you need to have mineral spirits, or paint thinner on hand for clean up. If you don’t want to sand this is the product you should use.  I still recommend making sure the surface is clear of any debris or dirt, so wipe down your surface before you apply the primer, it should be clean and dry.


 A little bit about primers…. You can use oil based primer and latex paint, but we don’t recommend using latex primer and oil based paint. It  will cause a reaction, and the results will not be good!  All sorts of gross stuff will happen, paint bubbling, cursing, objects flying OMG!!!! Don’ t do It!!!!  

The other product I love to use  and I would like  to mention is Floetrol!!!  (the orange bottle next to the can of primer).  It all but eliminates bush strokes, it almost creates a self  leveling paint. I really love this product!!!!

This time instead of using latex paint, for this project I decided to use Rustoleum Spray paint. Painters Touch Ultra Cover. Heirloom White, I just LLLLLLLLLOVE this color!!!! 

Remember to do this in a well ventilated space. I did it in our garage. Three light coats. Spray about 4 inches from surface in a steady sweeping motion. Light coats are better because you risk making runs or drips.  So here is a brief recap of the process. Sand with 220 grit sand paper,  brush or blow off any loose particles of dust and debris from surface. Prime, let primer cure for 24 hours and then paint!!!  I like to use Minwax Finishing Wax as a top coat to seal and protect the painted surface. It is available at Lowes or Home Depot.


Now this was certainly an easy project. Hope you all enjoyed!! Just a couple of hours and some paint!!!

This came out so great I’m really pleased. I think I’ll set my sites on a bigger better piece next!! Stay tuned!!!!

XOXO

M

Read Full Post »

Jenny Komenda

Design, Fashion and Food!

Just Imagine ExtraOrdinary

Reimagining the ordinary in homes, gardens and our lives.

Your Modern Couple

the design blog you never knew you needed

A Little Bit of Boondock Life

Just another day in the middle of nowhere...

Frugal with a Flourish

Design, Fashion and Food!

Clover Lane

Design, Fashion and Food!

somethingville.com

where my ideas come to life